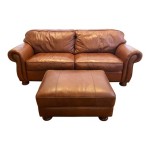
How To Reupholster a Sofa With Attached Cushions
Reupholstering a sofa with attached cushions presents a unique set of challenges compared to reupholstering a sofa with detached cushions. This guide provides a comprehensive walkthrough of the process, outlining necessary tools, materials, and techniques.
Tools and Materials: Before beginning, gather the necessary tools and materials. These typically include a staple remover, pliers, flathead screwdriver, seam ripper, measuring tape, fabric scissors, upholstery fabric, upholstery thread, staples, staple gun, webbing stretcher, webbing, batting, foam (if necessary), and a sewing machine (optional, but recommended).
Assessment and Preparation: Carefully examine the existing upholstery. Identify the order in which the fabric was applied and the locations of seams and staples. Taking photos throughout the disassembly process can be invaluable during reassembly. Remove any decorative elements like buttons, nail heads, or trim. This often requires carefully prying them loose with a flathead screwdriver.
Deconstruction: Using the staple remover and pliers, carefully remove the existing staples securing the upholstery fabric to the frame. Start from the back or underside of the sofa and work systematically. As you remove fabric sections, label them using masking tape and a marker to indicate their original location (e.g., "outside back," "inside arm"). This will serve as a pattern for cutting the new fabric. Once the outer fabric is removed, assess the condition of the underlying batting and foam. If deteriorated, replace these components.
Webbing Replacement (If Necessary): Examine the webbing supporting the seat and back. If it is sagging or broken, it should be replaced. Remove the old webbing using a staple remover. Cut new webbing to the appropriate length, ensuring sufficient overlap on the frame for stapling. Use a webbing stretcher to create taut webbing across the frame, securing it with staples at regular intervals.
Pattern Creation: Lay out the old fabric pieces on the new upholstery fabric. Use the old pieces as patterns, adding a few inches of excess fabric on all sides to allow for adjustments and stapling. Carefully cut out the new fabric pieces, ensuring they mirror the shape and size of the originals, plus the extra seam allowance. Mark any notches or specific points from the original fabric onto the new fabric for accurate alignment.
Sewing (If Necessary): If the original upholstery involved sewn seams, replicate these seams with the new fabric pieces. Use a heavy-duty sewing machine and upholstery thread. Match the seam type and stitch length of the original upholstery for a professional finish. Ensure all seams are aligned correctly and securely stitched.
Upholstery Application: Begin applying the new fabric, starting with the areas that were removed last during deconstruction. This typically starts with the inside back or deck. Smooth the fabric tautly across the frame and secure it with staples, working from the center outwards to avoid wrinkles. Maintain consistent staple placement and spacing, mirroring the original stapling pattern as closely as possible. Use a magnetic hammer or a rubber mallet to ensure a smooth, even surface.
Attaching the Fabric to Attached Cushions: This is where the process deviates significantly from reupholstering a sofa with detached cushions. The fabric for attached cushions is typically stapled directly to the frame, creating the cushion shape. Ensure the fabric is taut and smooth, paying close attention to corners and curves. Trim any excess fabric as needed to create a clean, finished edge.
Final Touches: Once the fabric is secured, replace any decorative elements that were removed earlier. This might involve sewing on buttons, hammering in nail heads, or reattaching trim. Use the photos taken during deconstruction as a guide for accurate placement.
Inspect and Adjust: After completing the reupholstery process, carefully inspect the entire sofa for any loose staples, wrinkles, or uneven areas. Make any necessary adjustments to ensure a professional and aesthetically pleasing result. Pay close attention to the seams and corners, ensuring they are smooth and tight.
This comprehensive guide details the general process. Specific techniques might vary depending on the sofa's design and construction. Consulting upholstery resources or seeking professional assistance is advisable, particularly for complex designs.

How To Reupholster Attached Couch Cushions It 39 S Been A Very Long Time Since I Ve Posted Diy

The Slipcover Maker S Guide To Detaching Back Cushions

How You Can Reupholster A Couch Perfectly All Interior Decor

Do It Yourself Divas Diy Strip Fabric From A Couch And Reupholster

How To Fix Sagging Couch Cushions Thistlewood Farm

How To Reupholster A Sofa With Attached Cushions Krostrade

The Slipcover Maker S Guide To Detaching Back Cushions

Remove Those Attached Back Cushions Quickly Slipcover Project Part 1

Easy Inexpensive Saggy Couch Solutions Diy Makeover Love Of Family Home

Diy Reupholster 3 Seater Sofa From Fixed To Removable Covers


