How To Sew Arm Covers for a Sofa
Protecting sofa arms from wear and tear, spills, and pet damage is a practical concern for many homeowners. Sewing custom arm covers offers a cost-effective and personalized solution. This article provides a comprehensive guide to creating tailored arm covers for any sofa style.
Materials Required:
The initial step involves gathering the necessary materials. These include durable fabric, measuring tape, scissors, pins, sewing machine, thread, and optional embellishments like piping or cording.
Fabric Selection:
Choosing the right fabric is crucial for both aesthetics and durability. Consider the existing sofa upholstery, room décor, and desired level of protection. Heavy-duty fabrics like canvas, denim, or twill offer excellent durability, while softer options like microfiber or chenille provide a more comfortable feel. Patterned fabrics can add visual interest, while solid colors offer a classic, versatile look. Pre-washed fabric is recommended to prevent shrinkage after the covers are made.
Measurement and Pattern Creation:
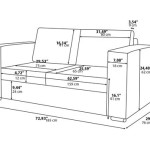
Accurate measurements are essential for a well-fitting arm cover. Begin by measuring the length of the sofa arm from the back to the front edge. Next, measure the width of the arm at its widest point. Finally, measure the height or thickness of the arm. Add a few inches to each measurement to allow for seam allowances and a comfortable fit. These measurements will be used to create a basic rectangular pattern. For more complex arm shapes, consider creating a paper template by draping paper over the arm and tracing its outline.
Cutting the Fabric:
Using the measurements and pattern, cut the fabric pieces. For a basic rectangular cover, two identical pieces of fabric are required. If using a patterned fabric, ensure the pattern is oriented in the desired direction on both pieces. For more complex shapes, carefully cut along the traced lines of the paper template.
Pinning and Sewing:
With the right sides of the fabric facing each other, pin the two pieces together along the edges, leaving one short end open. This opening will be used to turn the cover right side out. For a more polished look, consider adding piping or cording along the edges before pinning. This involves placing the piping between the two fabric layers and pinning all three layers together.
Stitching the Seams:
Using a sewing machine and a thread color that matches the fabric, stitch along the pinned edges with a straight stitch, leaving a seam allowance of approximately half an inch. Reinforce the stitching at the beginning and end of each seam to prevent unraveling. For curved seams, use a slightly shorter stitch length to ensure a smooth, even curve.
Finishing the Arm Covers:
Once the seams are stitched, carefully trim any excess fabric around the seam allowances. This helps reduce bulk and create crisper edges. Turn the cover right side out through the open end. Use a pointed object, like a chopstick or pencil, to gently push out the corners for a sharp, defined shape. Press the seams flat with an iron for a professional finish.
Closing the Opening:
The final step is to close the opening used for turning. This can be achieved by hand-stitching using a blind stitch or by machine stitching a top stitch along the edge. A blind stitch creates a nearly invisible closure, while a top stitch provides a more decorative finish.
Optional Embellishments:
Once the arm covers are complete, consider adding embellishments such as ties, buttons, or decorative stitching. Ties can be attached to the corners of the covers and tied around the sofa arms to secure them in place. Buttons can add a touch of elegance and can also be used to secure the covers. Decorative stitching can add visual interest and personalize the covers.
Placement and Care:
Slip the finished arm covers onto the sofa arms, ensuring a snug fit. Regularly remove and launder the covers according to the fabric care instructions to maintain their appearance and prolong their lifespan.
Adapting the Method:
This method can be adapted for various sofa arm styles. For T-shaped arms, adjust the pattern to accommodate the specific shape. For rounded arms, consider using elastic or a drawstring at the bottom edge to create a secure fit. The basic principles remain the same, emphasizing accurate measurements and careful construction.
Alternative Closure Methods:
Beyond hand-stitching and top stitching, other closure methods include zippers or Velcro. Zippers offer a convenient and secure closure, while Velcro provides a quick and easy option, particularly for frequently removed covers. The chosen closure method will depend on the specific design and desired functionality.

Tutorial Simple Fabric Armrest Covers

Tutorial Simple Fabric Armrest Covers

Diy Armrest Covers For Your Slipcovered Furniture The Slipcover Maker

Tutorial Simple Fabric Armrest Covers

Tutorial Simple Fabric Armrest Covers

Tutorial Simple Fabric Armrest Covers The Zen Of Making Arm Chair Sofa Diy

How To Make Arm Covers For A Chair

How To Sew Armrest Covers For Sofas 13 Steps With Pictures Arm Chair Sewing Sofa

Tutorial Simple Fabric Armrest Covers

Set Of 2 Stretch Armrest Covers Spandex Arm For Chairs Couch Sofa Armchair Slipcovers Recliner With Twist Pins Grey Com